Laravel Horizon with Forge and Envoyer
First published on February 7, 2018 · Last updated on May 9, 2020
I recently installed Horizon for Laravel.io and while it wasn’t that hard to install, I still had to figure some things out. Since this was the first time setting everything up I thought I’d write up the steps to take to get started with Horizon and set everything up with Forge and Envoyer.
Before you begin I suggest you read the introduction post and this setup guide both written by Taylor Otwell. They’ll give you an excellent introduction and while the setup guide already gives most of the steps used to set things up, this guide tries to guide you step by step and adds some extra’s for setting everything up with Envoyer.
Remember that this isn’t a guide that dives deep into Horizon, just enough to get it up and running. If you want more info about Horizon’s internals I suggest this excellent post by Mohamed Said.
Installation
The first step to get started is very simple. Simple do a composer require laravel/horizon on your Laravel project and run php artisan horizon:install to install Horizon. This will publish and register the App\Providers\HorizonServiceProvider where we can configure Horizon and publish any assets we'll need to view the dashboard.
Configuration
Queues
The next step is to set up our queue configuration. Go to the newly created horizon.php config file and go the the environments setting. Here you can define your queues. You can play around a little bit with this later but for now let’s keep the base configuration with just one queue.
Authorization
Next we'll set up any authorization rules to make sure no one can access the Horizon dashboard unwanted. You can do this with the gate method in the App\Provider\HorizonServiceProvider class.
protected function gate()
{
    Gate::define('viewHorizon', function ($user) {
        return in_array($user->email, [
            config('lio.horizon.email'),
        ]);
    });
}
I’ve configured the email address that will be checked through an environment variable so it’s easy to configure. It gets used to check if the correct user is authenticated to visit the dashboard. But you can really define anything you want here.
Notifications
In the boot method of the service provider I’ve added two notification methods which will send any notifications from Horizon to the email address and Slack webhook that I’ve set up. Don't forget that you'll need to configure a mail provider for the mail notifications. You're totally free to skip this for now and set it up later if you want. Any notification method is optional.
public function boot()
{
    parent::boot();

    Horizon::routeMailNotificationsTo(config('lio.horizon.email'));
    Horizon::routeSlackNotificationsTo(config('lio.horizon.webhook'));
}
Scheduler
If we want to get some cool metrics on our dashboard we’ll need to define a scheduler command. Make sure the scheduler is set up to take snapshots every five minutes. You can add this in the App\Console\Kernel class.
/**
 * Define the application's command schedule.
 *
 * @param  \Illuminate\Console\Scheduling\Schedule  $schedule
 * @return void
 */
protected function schedule(Schedule $schedule)
{
    $schedule->command('horizon:snapshot')->everyFiveMinutes();
}
After you’ve done this, commit the code changes and push to Github or whatever VCS host you use.
Envoyer
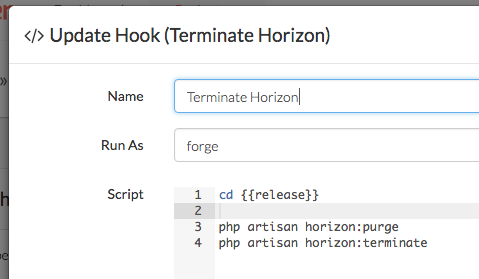
On Envoyer we need to define a new hook. The horizon:purge command will purge any orphan processes. The horizon:terminate command will finish any left over jobs and terminate the Horizon process. The daemon which we’ll set up later will make sure that the command is always restarted after we terminate it.
Set up the deployment hook after the “Activate New Release” action. This will make sure the command is run after we activate the new app release.
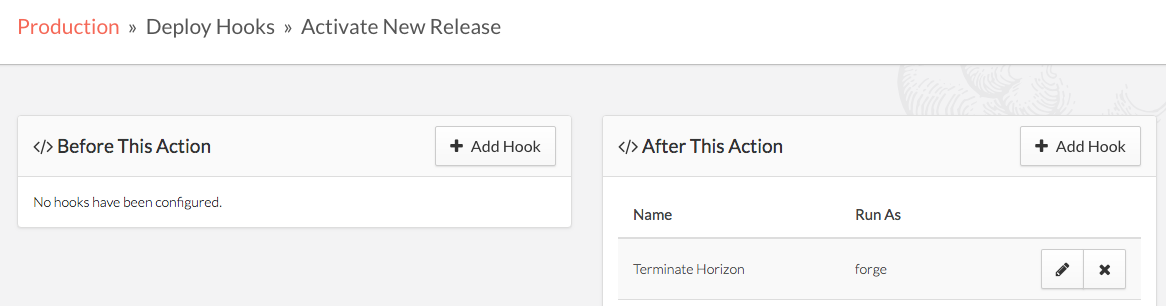 Add the hook after the "Activate New Release"
If you’re managing your environment variables with Envoyer make sure you set your QUEUE_CONNECTION env variable to redis.
You can now deploy the code we added before. Make sure the deploy finished before proceeding to the next step.
Forge
Scheduler
First, if you haven’t done so already, make sure the scheduler is set up correctly so the scheduled command is run to populate the metrics. Go to your server and the “Scheduler” menu item. Make sure you add a job which runs every minute and triggers the schedule:run command. Setup your command as follows:
php /home/forge/<site>/current/artisan schedule:run
Daemon
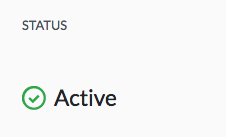
After setting up the scheduler we only need to add the daemon to make sure the Horizon command is started and re-started every time we deploy and terminate it. Go to your server and the “Daemons” menu item. Add a deamon with the php artisan horizon command to run in the /home/forge/<site>/current directory. After you’ve added this command, the daemon will enable the horizon command and you should be able to visit horizon at https://site.com/horizon and see the status below.
Don't forget that you need to be authenticated with the rules you defined in the gate method in your App\Provider\HorizonServiceProvider class.
Conclusion
This should be all that you need to get started with Horizon. Don’t forget that you don’t need to define queues through Forge as Horizon completely takes this over. You only need to change your horizon.php config file and Horizon will apply the changes on the next deploy.
About me
I'm a software engineer from Belgium and work as one of the core team members of Laravel, the popular PHP framework.
I'm also building Moneytrees, a product focused on making it easier to stay on top of invoices and expenses.
Together with my buddy Rias, we're also the creators of Eventy, a platform that connects the dots between user groups, speakers, conferences and attendees.
And I'm also the maintainer of Laravel.io, the Laravel community portal, where the community can ask questions, share knowledge, and connect with each other.
My passions are open-source, growing communities, and building products that people love.